How To Enable Mobile-Encrypted payments with Apple Pay/Google Pay™
This guide will walk you through how to utilize Apple Pay/Google Pay™ and how to enable mobile-encrypted payments within your system. It outlines the essential steps required on both the frontend and backend.
Apple Pay Integration Overview
Before Apple Pay can be used within your system, there are three key components involved in the integration process: The one-time, required, set up by Apple to authorize your domain, your domain verification, and where the Apple Pay button is displayed and user interaction begins. Each part plays a role in enabling a secure, mobile-encrypted payment experience.
Domain Verification
Domain Verification must be completed before adding the Apple Pay button to your website. This involves hosting the following verification file at the following path on your server:
Download Domain Verification File
https://{DOMAIN_NAME}.com/.well-known/apple-developer-merchantid-domain-association
Important: Do not embed this file in your HTML. It must be served directly by your web server as a static file. Also, after downloading, you Must rename the file and remove the '.txt' extension in order for it to be properly found.
Once the file is correctly hosted, USIO will validate the domain by communicating with Apple on your behalf. After successful verification, you can proceed confidently with implementing the Apple Pay button on your frontend.
Frontend Setup
Once your domain is verified, you can begin integrating the Apple Pay button into your frontend. This step involves loading the required script, adding the Apple Pay button, and configuring the payment and validation data. Include the following script tag in your HTML to load the USIO Wallet SDK, which facilitates the Apple Pay flow:
<script id="usioWalletScript" src="https://payments.usiopay.com/2.0/js/USIOWallet.js"></script>
To customize the appearance of the Apple Pay button, you can use Apple-supported CSS variables:

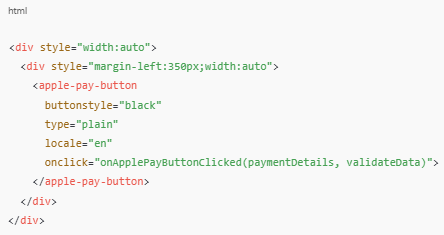
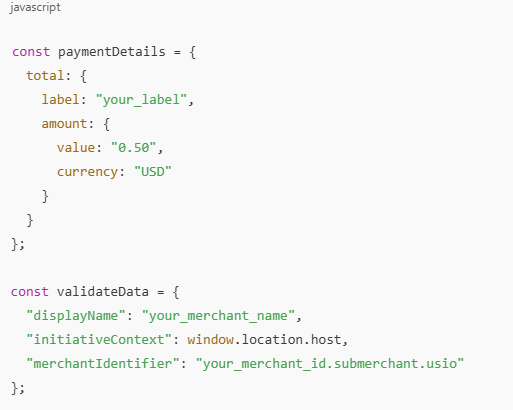
Place the Apple Pay button in your HTML (Example below), and connect it to your payment handler by using the html 'onclick' event handler. Then define the required paymentDetails and validateData JavaScript objects. These are passed into the click event handler which then executes the onApplePayButtonClicked().
Once this has been set up, when you make the frontend call to Apple with the proper objects, you should receive a successful response along with a response object that you need to catch. This Response object will contain the payment token that you need to send to USIO's backend to complete the transaction. That should look something like the following

Now you will need to take the response token (specifically the MobileWalletEncryptedData field from the response object) and send it to the backend, calling the
SubmitCCPayment() endpoint with the appropriate payload.
Google Pay Integration Overview
To integrate Google Pay, you must first create a Google Pay and Wallet Console account at the following link: Google Account Setup. After creating an account, you'll need to register your business and website. If you are unable to do this or run into any issues, please contact USIO's IT department, Integrations@usio.com.'
After Registration
Once your business and account are registered, you can begin integrating the Google Pay button into your frontend. This process includes loading the required script, adding the Google Pay button, and configuring the payment and validation data. Add the following script tag to your HTML to load the USIO Wallet SDK, which facilitates the Google Pay payment flow:
<script id="usioWalletScript" src="https://payments.usiopay.com/2.0/js/USIOWallet.js"></script>
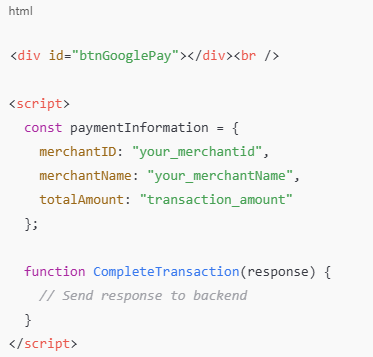
Place the required Google Pay element in your HTML (see example below).
Define the required paymentInformation JavaScript object with the desired input fields, which is then dynamically passed to Google Pay .
Once Google Pay responds, you must place the response in the CompleteTransaction() function parameter.
This should then take said response, and send the appropriate token to USIO's backend SubmitCCPayment() endpoint.
Link References